Creating a durable and reliable floor requires a base with an even greater level of strength and durability than the floor covering itself. The leaders in these parameters are concrete floors. Durable, smooth, and dry concrete floor is an ideal base for any type of flooring. In addition, concrete floors can withstand a large load on the surface, which allows them to be applied in rooms where it is planned to install heavy objects and equipment.
Content
- Base preparation
- Concrete floor insulation
- Reinforcement
- Formwork arrangement
- Concrete preparation and pouring
- Leveling the surface and screed concrete floor
Concrete Floors: Pouring Technology
Concrete is an affordable and fairly cheap material, it is easy to use, apply it yourself and it does not require special knowledge and skills. Thanks to these qualities, many professionals and homeowners equip the concrete floor with their own hands in the construction of country houses or repairs in apartments. The main thing is to know how to properly pour concrete floor so that it is strong and durable. So, before pouring the concrete floor, it is necessary to become familiar with the technology of DIY pouring a concrete floor, get the necessary tools and carry out the preparatory work, after which you can safely begin to apply the concrete floor. All work can be done independently, but to increase the speed and save budget you will require a partner who will perform his part of the work.
Pouring the concrete floor is divided into several stages:
- preparation of the base;
- concrete floor insulation;
- reinforcement;
- arrangement of formwork;
- preparation of concrete mix and pouring;
- leveling the surface and screed concrete floor.
Preparation of the Base
To fill up the concrete floor, you must perform a number of preliminary works. First of all it concerns the base. If the floor will be poured in the apartment, it is necessary to remove the old floor covering and tear down the old concrete screed until the floor slab. Typically, the thickness of the concrete floor is about 5 cm, and to remove it will have to use a punch. After removing the old floor to the overlap, clean the surface from dirt and proceed to the next stage.
Important! If the screen does not have obvious damage, cracks, and rifts, then you can keep it and proceed to level the surface itself for a new floor covering.
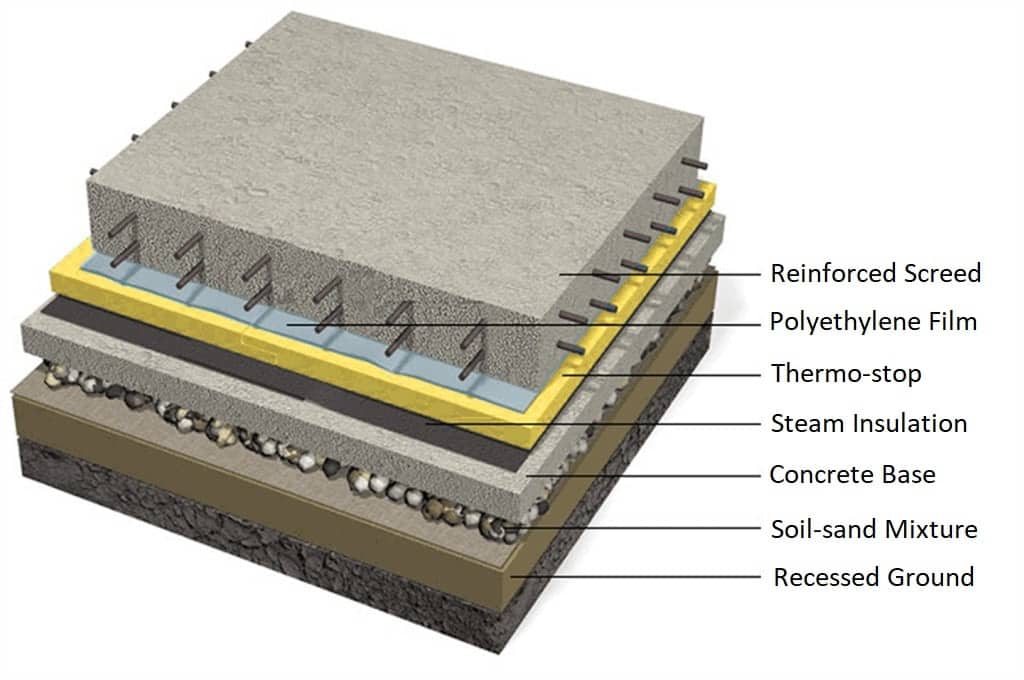
In private homes, things are a bit more complicated. The fact is that the concrete floor of the first floor of a private house is often made on the ground, and the installation of a concrete floor over the ground will require additional labor costs.
To prepare the base, do the following:
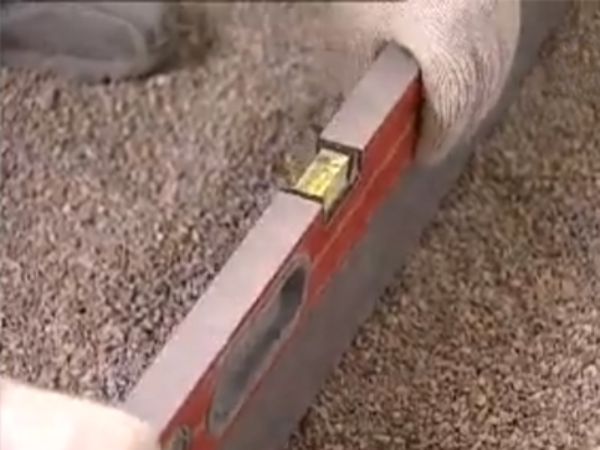
- Place a mark at the level of 1 m from the base of the doorway and transfer it to the walls around the perimeter of the room using the level.
- We measure 1 m down from the received marks; these marks will be the level (“zero”) to which it is necessary to pour concrete.
- In order to clearly see the “zero”, we hammer nails along the marks and tighten the cord.
- In the room where we will do the floor, we remove about 25 cm of soil.
- The surface is leveled on the horizon and tamped. For this you can use a log with a board nailed to it or a special vibrating plate.
- On the resulting plane we fill the gravel with a layer of 5 cm, carefully pour it with water and tamp it down.
- Pour 10 cm of sand on top of the gravel; we also pour and ram the sand.
Important! At the stage of base preparation, it is necessary to constantly ensure that the base is horizontal on the plane using a level. If the project provides communications that are hidden under the floor, then they must be laid simultaneously with the filling of sand, previously hidden in special boxes.
- On top of the sand we put about 10 cm of crushed stone, tamp down and sprinkle with sand to get a relatively flat surface.
Important! The size of the stone in the rubble should be 45-50 mm. To maintain the level of filling of all layers on the walls, you can put labels for each of them. It should also be noted that the thickness of the concrete floor itself should be at least 2 cm.
Concrete Floor Insulation
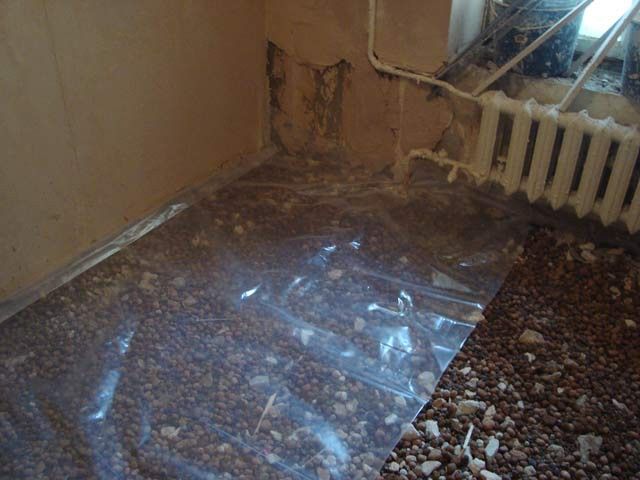
DIY Concrete flooring on the ground requires high-quality waterproofing. If it is not done, there will be constant dampness in the rooms, which will negatively affect the interior decoration, interior items, and the microclimate of the room as a whole. For waterproofing a concrete floor, you can use a simple polyethylene film with a thickness of 200 microns, waterproofing membranes, or any other type of waterproofing roll materials. For high-quality waterproofing, it should be noted that the film will need to be laid in several layers, while other waterproofing materials can be laid in one layer. Both the film and rolled waterproofing materials are laid with an overlap of about 20 cm and sealed with adhesive tape. The edges of the material should be drawn onto the walls with overlap, so that they reach the zero mark, and glued with adhesive tape to the surface of the walls.
In addition to waterproofing, you should also perform heat insulation of the concrete floor. Depending on the scheme of the concrete floor, you can use the following insulation materials that need to be laid at a certain stage of work:
- expanded clay;
- Styrofoam;
- stone basalt wool;
- mineral wool;
- polystyrene foam;
- extruded polystyrene foam;
- polyurethane foam;
- perlite;
- wood chipboards;
- thick moisture resistant plywood;
- cork coating;
- roll isolon;
- warm linoleum or carpet.
Reinforcement
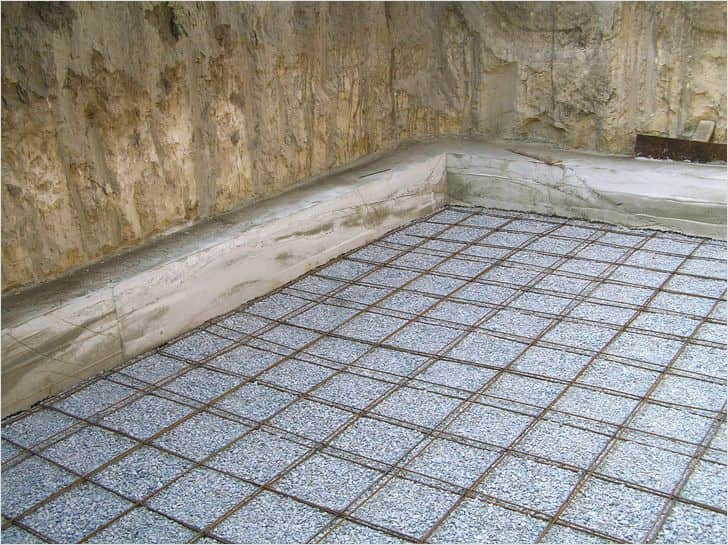
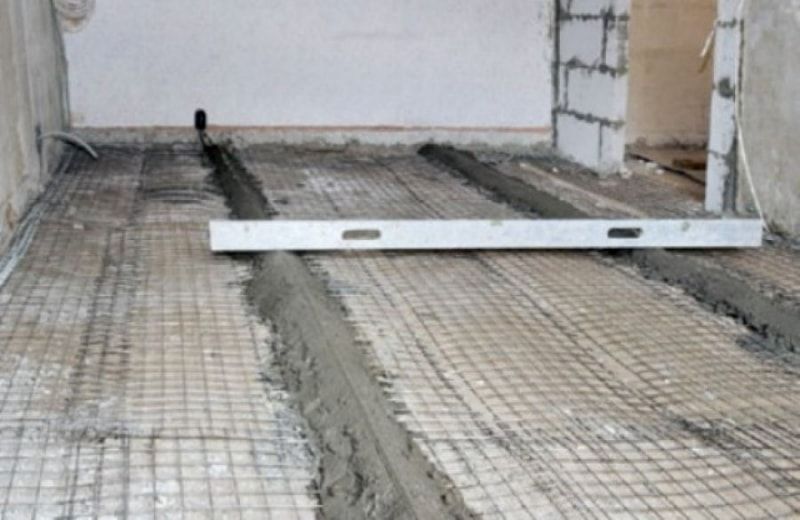
Reinforcement is performed in the case when the concrete floor will have increased loads. Use a metal or plastic mesh for reinforcement. You can make such a mesh by yourself by welding it from metal rods with a thickness of 3 mm to 5 mm. The mesh itself is placed on supports with a height of 2-3 cm, so that after pouring a solid whole is obtained. If a soft reinforcing mesh is used then pins are hammered into the ground and mesh itself is subsequently tensioned on them. Another material for the reinforcement of concrete floors is reinforcing rods with a thickness of 8 mm to 15 mm welded together in a single mesh.
Formwork Arrangement
To facilitate the pouring of the concrete floor in large and medium-sized rooms, you should build the formwork. To do this, the room is conventionally divided into equal rectangles (“cards”). The size must be chosen in such a way that the “card” can be filled in for one, maximum of two settings.
For the formwork itself, you can use ordinary boards or moisture-resistant plywood. Now you need to set the guides. They divide the room for “cards” and their height will correspond to the “zero” level, to which concrete will be poured. You can use a metal pipe, a wooden block, or a board as guides. The guide itself is laid on the prepared base and fixed with the help of thick cement mortar.
Between the guides, we install the formwork and finally form the “cards”. Before you make the concrete floor perfectly flat and smooth, we direct the guides and formwork to “zero” on the horizon using a level.
Important! In order to be able to take out the formwork and the guides from the poured concrete, they are lubricated with a special oil for formwork. Thanks to this, it is quite easy to separate the guides and the formwork from the concrete.
Preparing the Concrete Mix and Pouring It
In order for a concrete floor to be strong and durable, it must be cast in one go. Therefore, if there is a financial opportunity, then you should order ready-made concrete mix at the factory. It will be delivered in a concrete mixer and in a large volume at once. Do not have to spend time and effort to self-preparation of the solution.
If your budget does not allow it, then everything can be done by yourself. This will require an electric concrete mixer, cement, sand, and crushed stone. Cement should choose of the M500 or M400 type since the strength of concrete depends on this. As for sand, it should be clean, without impurities and clay.
For the preparation of concrete, it is necessary to take 1 part of cement, 2 parts of sand, 4 parts of rubble, and 0.5 parts of water. Mix concrete thoroughly in a concrete mixer and pour it into one “card”. We level with a shovel, we do the movements piercing vertically and we stretch over the whole area. In this uncomplicated way, concrete is gradually compacted, and air comes out of it. For better shrinkage, use a special vibrator. The vibrations created by it shake the concrete mortar, compact it, thereby allowing the concrete to penetrate into all the gaps and voids.
As soon as concrete milk appears on the surface, shrinkage can be stopped and transferred to another card, in which your workmate has filled in a fresh solution.
Important! The concrete should be poured in, starting from the opposite corner from the door and moving towards the door.
Leveling the Surface and Screed of Concrete Floor
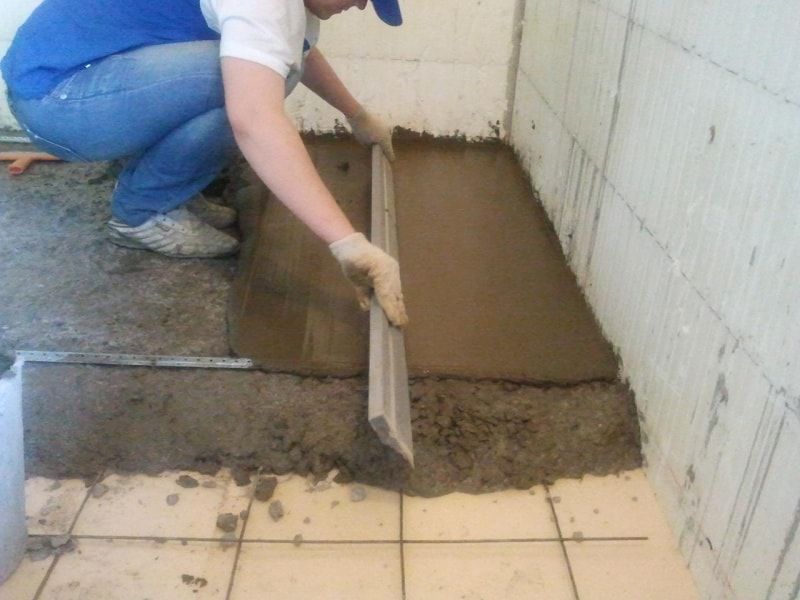
As soon as a few “cards” are filled with concrete, you can align the part of the concrete floor. For this, we use a stern longer than 1 m. We establish the stern on guides and drag it towards you. Thus, the excess concrete falls into the still unfilled “cards”, and the floor level goes to “zero”. Then we remove the formwork in the leveled places, fill the voids and continue to fill.
Having completed the casting, the concrete is allowed to stand for 3-4 days. Every day we should wet it with a small amount of water so that it dries up gradually and does not begin to crack. After that, we cover it with plastic wrap and leave it to solidify for 3-4 weeks, moistening it from time to time.
After solidifying, a screed layer is applied to the concrete floor:
- To do this, apply a layer of liquid cement mortar or a self-leveling mixture onto the floor with the addition of various binders.
- We start to do the screed from the corner and moving towards the door.
- When ready, let the screed dry for 2-3 days, but wetting it with water every day.
Now that the screed has hardened, you can proceed to laying the flooring.
The arrangement of concrete floors is a long and laborious process that does not tolerate haste. To create a really high-quality and durable concrete floor, it is necessary to observe the technology of its installation, otherwise, it will be necessary to break the entire thickness of the concrete with a perforator and re-fill it. But, despite all the shortcomings and the complexity of the arrangement, concrete floor remain the simplest type to install and is unpretentious in operation.

